DIY · March 23, 2015
Grown Up Versions of Your Favorite Old School Crafts
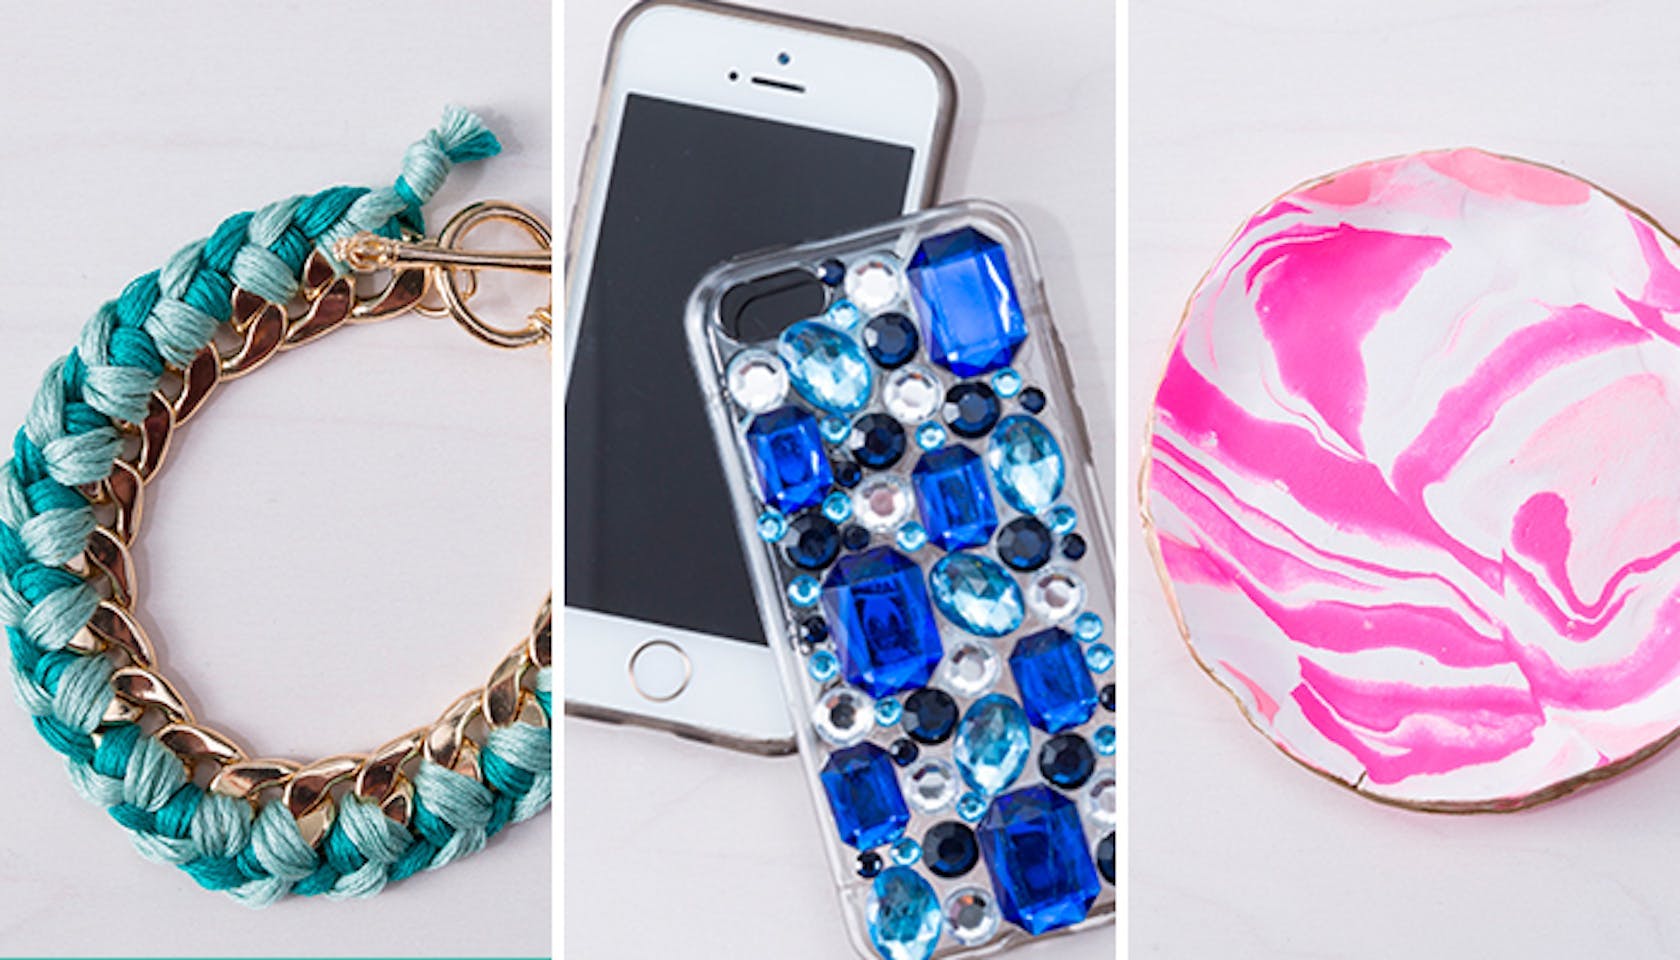
The Adult Friendship Bracelet
Supplies:
Curb link bracelet (try Forever 21 or H&M)
Embroidery thread in two colors
Scissors
2 bobby pins
How-To:
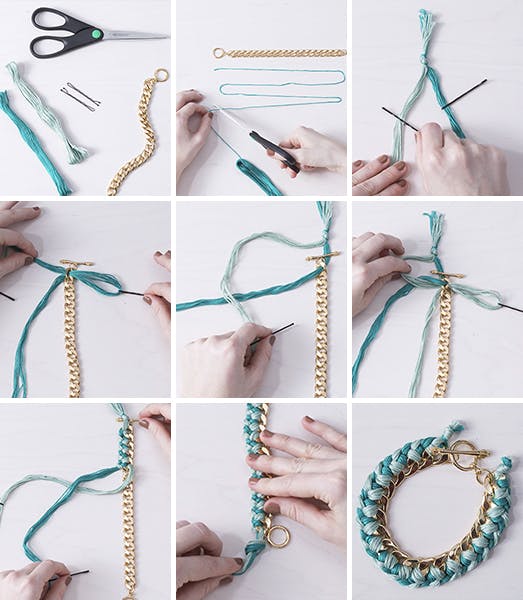
1. Cut eight pieces of each color of thread so that they are four times the length of the bracelet.
2. Knot all the threads at the top keeping the two colors separated down the middle. Hook a bobby pin two inches below the knot on each sidethis will act like a needle to help you weave the thread through the bracelet links.
3. Lay your chain bracelet on the right side of your thread, then take the bobby pin on the thread on the right (dark green) and pull it under the first chain link, then over the top to the left.
4. Take your second color (light green) and lay it over your first color (dark green).
5. Pull the second color under the same chain link and over the top to the left.
6. Repeat these steps until youve woven your thread through all the links on the bracelet.
7. Knot the threads at the end of the bracelet and trim the ends. Gift to your BFF (or keep for yourself!).
The Grown Up Jewelry Stash
Supplies:
White, light pink, and neon pink oven-bake clay
Knife
Rolling pin or flat round glass
Small bowl
Cookie sheet
Gold paint pen
How-To:
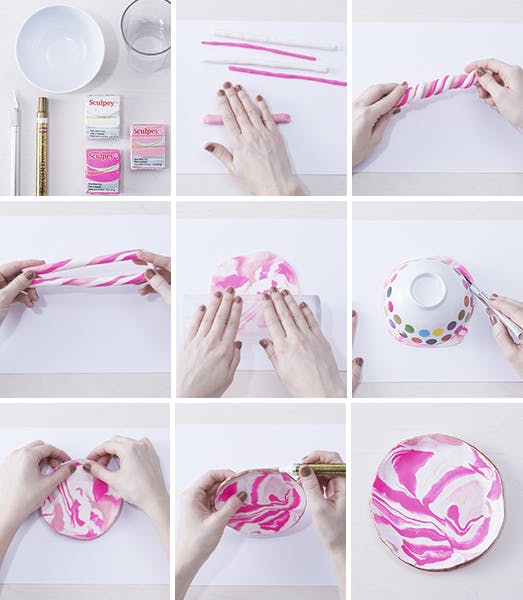
1. Separate half of the white clay, 1/4 of the light pink clay, and 1/8 of the neon pink clay from your blocks of clay and use your fingers to create two rolls of white, one of light pink, and two of neon pink, each five-inches long.
2. Twist all five rolls together to create a rope-like braid.
3. Knead them all together until you have a single roll about eight-inches long, then fold the roll in half, twist, and roll out again. Repeat this a couple more times to mix and marble the different colors.
4. Squish the clay together until you form a ball. Flatten out the ball using a rolling pin or flat glass on a clean surface until its about five inches across.
5. Lay the opening of your small bowl on top of the clay and cut around the side using your knife.
6. Using your thumb and your pointer and middle fingers, begin to push up the sides all the way around.
7. Bake the bowl according to the packaging on a cookie sheet. Once the pot has cooled, use your gold pen to paint the rim of your dish. Fill with rings, bracelets, and charms!
The Bedazzled Phone Case
Supplies:
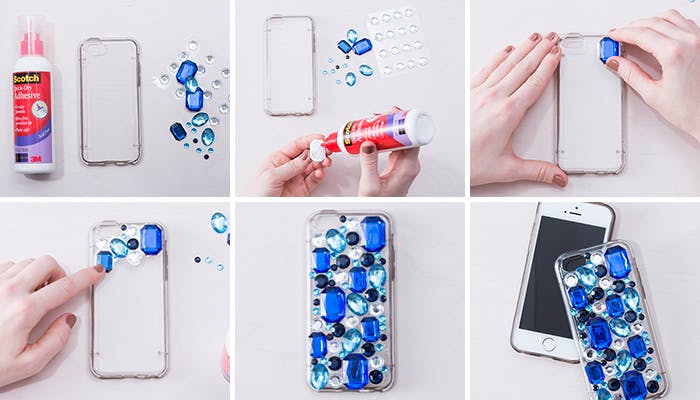
Clear phone case
Variety of sizes of plastic gems
Quick dry glue
How-To:
1. Starting in one corner of your phone case, dab glue onto a gem and secure in place.
2. Continue until you cover the entire case, making sure you fill in any gaps with smaller gems.
3. Let drythen show off your sparkly case in a mirror-facing selfie.